Saturday, May 30, 2009

Pink Saturday

Hello friends!

I have missed a few Pink Saturdays but had to get in on this one! Today, Saturday, May 30 marks one year that others have been posting pink with Beverly @How Sweet the Sound! Head over to How Sweet the Sound for more Pink Saturday participants! Congrats to Beverly for surviving one year of organizing all the pinkness! I don't know how she does it. ;)
Today I thought I'd share some pink flowers! We've had so much rain lately! :)
Hope you're having a grand Saturday!
Hugs!
Sheri

Thursday, May 21, 2009

Virginia Quilt Trail Dream Born--QUILT BARNS, PART 3

Council Area Woman Says 'Barn Quilts' Could Mean Increased in Tourism by Cathy St. Clair from THE VIRGINIA MOUNTAINEER, On-Line Edition, Buchanan County's Family Newspaper Since 1922.

When Ilene Compton Wolfe and her husband, Charles, made treks down to the Pigeon Forge, Tenn., area on vacation, Ilene always noticed the beautiful quilt designs displayed on Tennessee barns which took part in the Quilt Trail in that state.

And as she looked, marveling at the designs and the detail found on the side of a barn, Wolfe reasoned, if it worked in Tennessee, then why not in Virginia? Add to it an endpoint destination of the Breaks Interstate Park and Wolfe thinks the success of a Quilt Trail in Virginia could be just as beneficial as it is in neighboring Tennessee. To that end, she’s started the project in Virginia, displaying quilt patterns on her family’s barn at Council on Rt. 83. Now, she says, she would like to see others get involved in the project. She’s in the process of attempting to contact the Buchanan County Extension Office to discuss the project and what the extension office might do to help promote it.

"I think using old and weathered tobacco barns or out buildings would be an excellent way for local artists to paint traditional quilt squares on their barns," Wolfe says. She first became interested in the quilts in making the trip from Council to Pigeon Forge. "I kept noting the decorative art work on the barns in Tennessee," Wolfe says. Her interest sparked, the now retired Council Elementary school librarian began researching barn quilts on the internet. She looked for them in Virginia and could find none and in searching a quilt trail website only found they exited in Tennessee, Ohio and Iowa. "The beautiful state of Virginia with so many agricultural areas is lagging behind in this unique type of art," Wolfe says.

In designing the quilt square for display on her Council area barn, Wolfe says, it became a real family project. Her daughter-in-law, Sally, is an avid quilter and Wolfe says Sally helped her to research and design the quilt squares they chose for their barn project. They chose a carpenter’s wheel pattern, a tribute to Wolfe’s husband Charles, who may constantly be found in his wood shop out back designing and making furniture and other wood crafted items. It also serves as a tribute to the many talented carpenters throughout the area, Wolfe says.

"We have so many wonderfully skilled carpenters in this area and they needed to be acknowledged -- including my husband -- for their work," Wolfe says. "That’s why I chose that pattern. The second pattern chosen for display was "Grandmother’s Fan." "I’m a grandmother and I’m acknowledging the many grand-mothers who take care of their grandchildren," she says.

Tuesday, May 19, 2009

Cherry Pie

My latest punch needle pattern is from Little House Needleworks and called 'Cherry Pie'. I love anything with crows and cherries, so what a perfect combination! I hope to have it finished by this weekend and up on eBay. It's a rather large piece and I'm thinking of adding it to a wooden box I have, maybe paint the box? I never know what the punch needle "turns into" until I sit down to do it. Have to wait on the Creativity Fairies to visit me. :)

I hope you're having a terrific Tuesday!

Hugs,
Sheri

Tea on Tuesday: Orange and Macadamia nut cookies

Ingredients:
* 4 cups all-purpose flour
* 2 cups sifted powdered sugar
* 1 cup cornstarch
* 2 cups butter (no substitutes)
* 1 cup chopped macadamia nuts or toasted walnuts
* 2 egg yolks
* 1 tablespoon finely shredded orange peel
* 4 to 6 tablespoons orange juice
* Granulated sugar
* 2 cups sifted powdered sugar
* 3 tablespoons softened butter (no substitutes)
* 1 teaspoon finely shredded orange peel
* 2 to 3 tablespoons orange juice
* Finely chopped macadamia nuts (optional)

Directions:
1. Preheat oven to 350 degree F.

2. Combine flour, powdered sugar, and cornstarch in a large mixing bowl. Using a pastry blender or two knives, cut in 2 cups of butter until mixture resembles coarse crumbs. Stir in the 1 cup nuts. Combine egg yolks, 1 tablespoon orange peel, and 4 tablespoons of the orange juice in a small mixing bowl; add to flour mixture, stirring until moistened. If necessary, add enough of the remaining 2 tablespoons orange juice to moisten.

3. Knead dough on a lightly floured surface until it forms a ball. Arrange balls on an ungreased cookie sheet. Dip bottom of a fluted glass in granulated sugar, and use it to flatten one ball to 1/4-inch thickness. Repeat for remaining cookies.

Bake in the preheated oven for 12 to 15 minutes or until edges begin to brown. Transfer cookies to a wire rack; let cool.

5. Meanwhile in a small bowl stir together powdered sugar, 3 tablespoons butter, 1 teaspoon orange peel and enough of the 2 to 3 tablespoons juice to make sauce of speading consistency.

6. If desired, sprinkle with finely chopped macadamia nuts.

Makes 72 cookies.

~~yummy recipe and photo from: bhg.com~~

Monday, May 18, 2009

Lily® Sugar’n Cream® Crochet Reusable Grocery Bag

photo and directions courtesy of Lily
MATERIALS:

* Lily® Sugar’n Cream® Confectionary Colors (Ombres 340 g / 12 oz)- MC: Fruit Cake - 1 Ball
* Lily® Sugar’n Cream® Confectionary Colors (Solids 400 g / 14 oz)- A: Pistachio - 1 Ball
* Size 5 mm (U.S. H or 8) Crochet Hook or Size Needed to Obtain Gauge

INSTRUCTIONS:

**Bag measures approx 13 x 11 x 7 ins [33 x 28 x 18 cm].


**GAUGE: 12 sc and 13 rows = 4 ins [10 cm].


Front and Back: (make 2 pieces alike).

Note: Ch 3 at beg of rnd or row counts as dc.

With MC, ch 4. Join with sl st in first ch to form a ring.

1st rnd: Ch 3 (counts as dc). 2 dc in ring. (Ch 3. 3 dc in ring) 3 times. Ch 3. Join with sl st in top of ch 3.

2nd rnd: Sl st in next dc. Ch 3. *(3 dc. Ch 3. 3 dc) in next ch-3 sp.** 1 dc in center dc of next 3 dc. Rep from * twice more, then from * to ** once. Join with sl st in top of ch 3.

3rd rnd: Ch 3. 2 dc in same sp as sl st. *1 dc in center dc of next 3 dc. (3 dc. Ch 3. 3 dc) in next ch-3 sp. 1 dc in center dc of next 3 dc.** Miss next dc. 3 dc in next dc. Rep from * twice more, then from * to ** once. Join with sl st in top of ch 3.

4th rnd: Sl st in next dc. Ch 3. Miss next dc. 3 dc in next dc. 1 dc in center dc of next 3 dc. *(3 dc. Ch 3. 3 dc) in next ch-3 sp.** (1 dc in center dc of next 3 dc. Miss next dc. 3 dc in next dc) twice. 1 dc in center dc of next 3 dc. Rep from * twice more, then from * to ** once. 1 dc in center dc of next 3 dc. Miss next dc. 3 dc in next dc. Join with sl st in top of ch 3.

5th rnd: Ch 3. 2 dc in same sp as sl st. 1 dc in center dc of next 3 dc. Miss next dc. 3 dc in next dc. 1 dc in center dc of next 3 dc. *(3 dc. Ch 3. 3 dc) in nextch-3 sp.** (1 dc in center dc of next3 dc. Miss next dc. 3 dc in next dc)3 times. 1 dc in center dc of next 3 dc. Rep from * twice more, then from * to ** once. 1 dc in center dc of next 3 dc. Miss next dc. 3 dc in next dc. 1 dc in center dc of next 3 dc. Join with sl st in top of ch 3.

6th rnd: Sl st in next dc. Ch 3. (Miss next dc. 3 dc in next dc. 1 dc in center dc of next 3 dc) twice. *(3 dc. Ch 3. 3 dc) in next ch-3 sp.** (1 dc in center dc of next 3 dc. Miss next dc. 3 dc in next dc) 4 times. 1 dc in center dc of next 3 dc. Rep from * twice more, then from * to ** once. (1 dc in center dc of next 3 dc. Miss next dc. 3 dc in next dc) twice. Join with sl st in top of ch 3.

7th rnd: Ch 3. 2 dc in same sp as sl st. (1 dc in center dc of next 3 dc. Miss next dc. 3 dc in next dc) twice. 1 dc in center dc of next 3 dc. *(3 dc. Ch 3. 3 dc) in next ch-3 sp.** (1 dc in center dc of next 3 dc. Miss next dc. 3 dc in next dc) 5 times. 1 dc in center dc of next 3 dc. Rep from * twice more, then from * to ** once. (1 dc in center dc of next 3 dc. Miss next dc. 3 dc in next dc) twice. 1 dc in center dc of next 3 dc. Join with sl st in top of ch 3.

8th rnd: Sl st in next dc. Ch 3. (Miss next dc. 3 dc in next dc. 1 dc in center dc of next 3 dc) 3 times. *(3 dc. Ch 3. 3 dc) in next ch-3 sp.** (1 dc in center dc of next 3 dc. Miss next dc. 3 dc in next dc) 6 times. 1 dc in center dc of next 3 dc. Rep from * twice more, then from * to ** once. (1 dc in center dc of next 3 dc. Miss next dc. 3 dc in next dc) 3 times. Join with sl st in top of ch 3. Fasten off.

Top Edging: ***1st row: With RS facing, join MC with sl st in top right corner. Ch 3. 2 dc in same sp as sl st. (1 dc in center dc of next 3 dc. Miss next dc. 3 dc in next dc) 7 times. 1 dc in center dc of next 3 dc. 3 dc in next ch-3 sp. Fasten off.

2nd row: With RS facing, join MC with sl st in top of beg ch 3 of 1st row. Ch 3. 1 dc in next dc. Miss next dc. 3 dc in next dc. (1 dc in center dc of next 3 dc. Miss next dc. 3 dc in next dc) 7 times. 1 dc in center dc of next 3 dc. 1 dc in last dc. Fasten off.***


Bottom Edging: Work from *** to *** as given for Top Edging across bottom of Motif.


Outer Edging: Join MC with sl st in any corner. Ch 1. Work 1 rnd of sc around outer edge of Front and Back, having 3 sc in each corner. Join in first sc. Fasten off.


Gusset and Base: With A, ch 27.

1st row: 1 dc in 5th ch from hook (counts as dc, ch 1, dc). *Ch 1. Miss next ch. 1 dc in next ch. Rep from * to end of ch. 25 sts. Turn.

2nd row: Ch 4 (counts as dc and ch 1). *1 dc in next dc. Ch 1. Miss next ch-1 sp. Rep from *, ending with 1 dc in 3rd ch of turning ch. Turn.

Rep last row until work from beg measures 37 ins [94 cm]. Fasten off. Place markers on side edges 13 ins [33 cm] and 24 ins [61 cm] down from foundation row.


Handles (make 2).

With A, ch 13.

1st row: 1 dc in 4th ch from hook (counts as 2 dc). 1 dc in each of next 9 ch. 11 dc. Turn.

2nd row: Ch 3. 1 dc in each dc to end of row. Turn.

Rep last row until Handle measures 20 ins [51 cm]. Do not fasten off. Fold Handle in half lengthwise and work 1 row of sc through both thicknesses down length of Handle to join sides. Fasten off.


FINISHING:

Pin Front and Back pieces to Gusset and Base matching markers to corners. With WS tog and A, work 1 rnd of sc around Front and Back to join Gusset and Base. Sew Handles in position.

Friday, May 15, 2009

My Morning Visitor

I suppose he was waiting on breakfast this morning. To my surprise, there he was when I came outside today. We've been having alot of rain lately so I suppose shouldn't have been surprised. I have never seen one here before! Well, he is rather cute, I think. I called him Freddie and hope he stays around. Yes, I had to warn my husband not to step on Freddie this morning...WHO?? Freddie, our guest, dear! ;)

Wednesday, May 13, 2009

Spring Rufle Top Tutorial


Sew, Mama, Sew has a great tutorial for a spring ruffle top! How cute and summery! I just had to share this! :)

Tuesday, May 12, 2009

Tea on Tuesday: Mini Fruit Tortes

Ingredients:
* 4 eggs
* Nonstick cooking spray
* 1/4 cup sugar
* 1/8 teaspoon salt
* 1/3 cup mazoh meal
* 1/3 cup ground walnuts
* 1/2 teaspoon finely shredded orange peel
* 2 tablespoons orange juice
* 1/4 cup honey
* 1/4 teaspoon finely shredded orange peel
* 1/4 cup sliced toasted almonds
* Shredded orange peel (optional)

Directions:
1. Separate eggs; let stand, covered, at room temperature for 30 minutes. Preheat oven to 325 degree F.

2. Spray the cups of six 3-1/4-inch muffin pans or twelve 2-1/2-inch muffin pans with nonstick cooking spray. Set prepared pans aside.

3. In a mixing bowl beat egg yolks, 2 tablespoons of the sugar, and the salt with an electric mixer on medium to high speed about 4 minutes until thick and lemon-colored. Stir in the matzoh meal, walnuts, the 1/2 teaspoon orange peel, and the orange juice. Set aside. Wash beaters thoroughly.

4. In a large mixing bowl beat egg whites with an electric mixer on medium speed about 1 minute or until soft peaks form (tips curl). Increase speed to high and beat in remaining sugar until stiff, flossy peaks form (tips stand straight).

5. Gently fold egg yolk mixture into egg whites. Divide batter evenly among prepared pans, filling smaller cups to the top. Bake for 15 minutes for small pans or 30 minutes for large pans, or until golden color and a wooden toothpick inserted near center comes out clean. Cool in pans on a wire rack for 5 minutes. Loosen sides. Remove from pans. Place, top sides up, on wire rack or serving platter.

6. To make decorative paper collar: For small cakes cut 12 pieces of heavy-weight stiff pink or other pastel paper 8-1/2x2-inches. Fold in half lengthwise and cut half-inch deep snips along the folded edge every half inch. Form into a circle around cake and secure with a paper clip or transparent tape. Tie with 1/2-inch ribbon and remove paper clip. Repeat with remaining tortes. If baking large cakes, use six 11x2-1/2-inch pieces of heavyweight stiff pink paper.

7. In a small bowl combine honey and the 1/4 teaspoon orange peel. Drizzle over tops of cakes. Sprinkle with almonds and additional shredded orange peel, if desired.

Makes 6 large or 12 small cakes.

~~yummy recipe and photo from: recipe.com~~

Monday, May 11, 2009

Blue Monday

Hello friends!

here it is another Blue Monday! Sally is hosting this Monday celebration and I just had to join in on the fun!

Today I am sharing a beautiful Royal Albert Moonlight Rose tea set. I just love tea (as you can tell by one of my other blogs).

Hope you're having a grand Monday!

Lily® Sugar’n Cream® Crochet Granny Square Dishcloth

photo and directions courtesy of Lily
MATERIALS:

* Lily® Sugar’n Cream® Confectionary- Colors (Solids 400 g / 14 oz): MC: Nougat - 1 Ball and A: Cinnamon - 1 Ball

* Size 5 mm (U.S. H or 8) Crochet Hook or Size Needed to Obtain Gauge

INSTRUCTIONS:

**Dishcloth measures approx 101/2 ins [26.5 cm] square

**GAUGE: 14 sc and 15 rows = 4 ins [10 cm].


With MC, ch 6. Join with sl st in first ch to form a ring.


1st rnd: Ch 3 (counts as dc). 2 dc in ring. (Ch 3. 3 dc in ring) 3 times. Ch 3. Join with sl st to top of ch 3. Break MC.

2nd rnd: Join A with sl st in any corner ch-3 sp. Ch 3 (counts as dc). (2 dc. Ch 3. 3 dc) in same sp. *Ch 1. (3 dc. Ch 3. 3 dc) in next corner ch-3 sp. Rep from * twice more. Ch 1. Join with sl st to top of ch 3. Break A.

3rd rnd: Join MC with sl st in any corner ch-3 sp. Ch 3 (counts as dc). (2 dc. Ch 3. 3 dc) in same sp. *Ch 1. 3 dc in next ch-1 sp. Ch 1.** (3 dc. Ch 3. 3 dc) in next corner ch-3 sp. Rep from * twice more, then from * to ** once. Join with sl st to top of ch 3. Break MC.

4th rnd: Join A with sl st in any corner ch-3 sp. Ch 3 (counts as dc). (2 dc. Ch 3. 3 dc) in same sp. *(Ch 1. 3 dc in next ch-1 sp) twice. Ch 1.** (3 dc. Ch 3. 3 dc) in next corner ch-3 sp. Rep from * twice more, then from * to ** once. Join with sl st to top of ch 3. Break A.

5th rnd: Join MC with sl st in any corner ch-3 sp. Ch 3 (counts as dc). (2 dc. Ch 3. 3 dc) in same sp. *(Ch 1. 3 dc in next ch-1 sp) 3 times. Ch 1.** (3 dc. Ch 3. 3 dc) in next corner ch-3 sp. Rep from * twice more, then from * to ** once. Join with sl st to top of ch 3. Break MC.

6th rnd: Join A with sl st in any corner ch-3 sp. Ch 3 (counts as dc). (2 dc. Ch 3. 3 dc) in same sp. *(Ch 1. 3 dc in next ch-1 sp) 4 times. Ch 1.** (3 dc. Ch 3. 3 dc) in next corner ch-3 sp. Rep from * twice more, then from * to ** once. Join with sl st to top of ch 3. Break A.

7th rnd: Join MC with sl st in any corner ch-3 sp. Ch 3 (counts as dc). (2 dc. Ch 3. 3 dc) in same sp. *(Ch 1. 3 dc in next ch-1 sp) 5 times. Ch 1.** (3 dc. Ch 3. 3 dc) in next corner ch-3 sp. Rep from * twice more, then from * to ** once. Join with sl st to top of ch 3. Fasten off.

Thursday, May 7, 2009

Quilt Top Giveaway

Hey everyone!

Ginger at Primitives by the light of the moon is having an awesome giveaway! These are the two gorgeous lap-size quilt tops she is offering:


Enter for your chance at winning!
Have a great Thursday!

Wednesday, May 6, 2009

Southwest Horses

Hello friends!

My name is Sheri and I am officially a punch needle addict! :) Just some humor there, although it does seem to be true! I love my little part-time craft business. It's interesting because I love every step, every stage of the project. I enjoy the punch needle & I enjoy "making" it into new items. Oh sure, I love the sales on eBay, but there have been few (if any) jobs in my life that I actually enjoyed every second of. Hmmm...I wonder if I have ever had a job I enjoyed every second of? Well, as the saying goes, "enjoy what you do and you'll never work a day in your life". Now...if I could just make this a full-time job with benefits! ;) Well, guess I'd better keep the day job!

Hope you're having a wonderful Wednesday!

Hugs!
Sheri

Outdoor Wednesday

WELCOME TO OUTDOOR WEDNESDAY! A day devoted to wonderful outdoor pictures by hostess Susan at A Southern Daydreamer.


We've had nothing but rain, rain, and more rain lately, and although the grass has gone wild and needs to be mowed again(!) the flowers are looking gorgeous! I love spring-time! I love the daffodils, red bud trees, forsythia, dogwood trees...it's all just a delight for the senses...and when the lilac blooms (!)...it's heavenly! I love to walk outside and just breathe in all the scents.

Hope you're having a fabulous Wednesday!

Hugs,
Sheri


Tuesday, May 5, 2009

Tea on Tuesday: Candied Orange Cake

Ingredients:
* 1 1/3 cups all-purpose flour
* 2/3 cup sugar
* 2 teaspoon baking powder
* 1/4 teaspoon salt
* 2/3 cup milk
* 2 tablespoon olive oil
* 2 tablespoon butter, softened
* 1 egg
* 1 teaspoon vanilla
* 5 Candied Orange Slices, chopped (about 3/4 cup) (see recipe below)

Directions:
1. Preheat oven to 350 degree F. Lightly grease and flour a 9 x 1 1/2-inch round baking pan; set aside.

2. In a large mixing bowl combine the flour, sugar, baking powder, and salt. Add milk, oil, butter, egg, and vanilla. Beat with an electric mixer on low speed until combined. Beat on medium speed for 1 minute. Stir in chopped Candied Orange Slices. Pour batter into prepared pan.

3. Bake for 25 to 30 minutes or until a wooden toothpick inserted near the center comes out clean. Remove and cool in pan on a wire rack for 10 minutes. Remove cake from pan. Cool completely.

4. Place cake on a serving plate. Arrange Candied Orange Slices on top of cake. Drizzle with 1 tablespoon of the orange syrup.

Makes 8 to 10 servings.

Candied Orange Slices:
Trim ends from 3 navel oranges; slice into 1/4 inch thick slices. In a large saucepan combine 2 cups sugar and 1 cup water. Bring to boiling; add orange slices. Return to boiling. Reduce heat to medium and boil gently, uncovered, for 12 minutes, gently stirring orange slices into syrup occasionally. Remove from heat. Preheat oven to 200 degree F. Line a very large baking sheet with parchment paper. Remove orange slices from syrup using tongs or a fork, reserving syrup. Arrange orange slices on prepared baking sheet. Bake for 1 hour or until oranges are translucent and candied, but still soft. Remove from oven; cool completely on baking sheet. Store in an airtight container. Transfer syrup to a small bowl and chill until needed.

~~yummy recipe and photo from: bhg.com~~

Friday, May 1, 2009

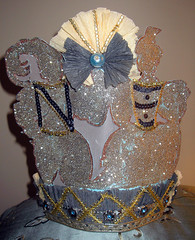
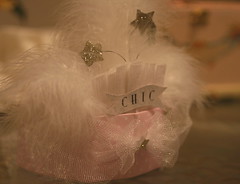
Flickr Friday: Crowns & Tiaras fit for a queen

Please click on photo to be taken to the owner's Flickr page, thanks!


Queen of Hearts Crown!
Originally uploaded by Lisa Kettell


birthday tiara 3
Originally uploaded by MemrieMare


Green Fairy paper crown
Originally uploaded by Violet Skies